I remember the first time a friend told me she made her own sourdough bread…
I was shocked. Here I was a culinary school graduate and I had never made my own bread outside of school. I had never even considered that I could make my own sourdough bread. I probably made it in school, but I don’t remember. I do remember hating my baking class because the teacher was a jerk. And he would come over to “help” you with projects with wet hands and that always grossed me out. So that turned me off from baking, once I no longer had to for a grade.
But here was this fellow mom who wanted to feed her family well making her own bread like it was no big thing. This was probably 4 years before I ever made my own loaf. But watching her make that bread planted a seed that would sprout into a beautiful sourdough relationship later on down the road.
Then a different friend gave me some starter. And I had zero idea what to do with it. So I put it in my fridge and I thought I let it die, I didn’t but I’ll get to that later. So I waited a while, until it wasn’t quite as embarrassing to ask for more, and this time I was determined to turn it into bread. So I found a recipe, one that I now realize had way too many ingredients like honey, baking soda and eggs, and went for it.
I did make a loaf, and it was delicious. But the recipe was so complicated, it had these elaborate stretch and fold instructions and even though it tasted good, it wasn’t worth the extra ingredients and time it took to make the final product.
Eventually I was blessed with a recipe similar to this one. I’ve adjusted it a bit over the years, but I stand by the fact that this is not only the easiest recipe I’ve ever used, but it is also reliably and 95% of the time my bread turns out almost exactly the same. The other 5% of the time my starter is having a bad day and decides to sabotage my bread. But that’s ok. I love sourdough because it is always keeping me on my toes.
I love this recipe because it is 4 ingredients; starter, flour, water and salt. Which I think is the beauty of a simple but delicious loaf of bread. The four most basic ingredients in your kitchen are going to produce something amazing. In my humble opinion there isn’t anything that can rival the experience of eating a slice of fresh bread covered with butter, even better if your butter is homemade!
I know sourdough can be intimidating. Everyone had an opinion about it. You’ve probably seen whole threads about things like “oven spring” and “good crumb vs bad crumb.” And for a while, things like this kept me from wanting to make bread. What if my bread has a bad crumb, and doesn’t get springy in the oven? What if my loaf over ferments and under-proofs?
You could read for days about the science of sourdough, and how so-and-so’s grandma has the best recipe that just have to try, and the mom on instagram has the recipe with the best sour flavor. But you know what? None of that is going to matter when you cut into your first loaf of bread and get to eat it. And your family and friends are never going to say things like “it’s good but could have a better crumb.” Or, “it’s lacking oven spring.” They are going to be so excited to eat fresh bread, and unless they are professional food judges, they aren’t even going to know what your bread could have a better crumb.
So throw all the rules you’ve heard out the window. And come into this with a sense of excitement. You are about to bake your own loaf of sourdough bread, and for me that is really empowering.
Questions I had as a first time sourdough baker…
There are lots of things on the internet about sourdough. And I’m sure it all comes from good places. Sourdough people just wanting to help other sourdough people. But I think all the info, most of which is conflicting, doesn’t serve the novice sourdough maker. So here are my thoughts on many of the things you’ll read about online.
Sourdough reacts badly to metal…
I googled “does sourdough react badly to metal” and these were the first two things to come up.
- This is a myth that comes from the olden days when tin was more common than stainless steal.
2. Yes, the acid in the starter can react with the metal and leach toxins into your dough, if using metal other than stainless steal.
So the moral of this one is this; stainless steal seems to be fine, but if you aren’t sure if your bowl is stainless steal maybe be safe and use ceramic.
There’s a black liquid floating on top of my starter, I must have killed it…
This is what happened to my very first sourdough starter. And I threw away a perfectly good thing of starter because I believed that I had killed it. But then a kind friend told me that that black liquid is called “hooch” and is not a sign that you have killed your starter. It simply means your starter is hungry and needs to be fed.
When you see this hooch simply spoon it out, and feed your starter. If there is mold in your starter you have killed it, or maybe you haven’t killed it, but you definitely don’t want to bake with it. So go ahead and toss moldy starter. But keep and feed your starter if it has hooch floating on the top layer.
I fed my starter but it didn’t rise…what do I do now?
Feed it again! This happens to me frequently, especially during the winter when my house is fairly cold. If I feed my starter at 7am one day, and it hasn’t risen by that evening, I will feed it again the next morning. And this has worked every time. It’s inconvenient, especially if you were planning to bake a loaf of bread the first time you fed it. But it’s not the end of the world.
I have noticed that this happens when my starter has been in the fridge for a week or more without being fed. And that first feeding just isn’t enough to jump start it. So I feed it again and it’s ready to go.
You shouldn’t cut your bread for at least 5 hours or it will get gummy…
I’ll admit this is one rule I do follow. But not all the time. I usually bake my loaf in the morning and let it sit while I do other things, then I use it for lunch. Once I cut one after about two hours and I didn’t notice any “gummy-ness.” So I would say try both, let one loaf cool for a few hours, and the next loaf you make cut it right away, and see if there is a noticeable difference. Then drop a comment below letting me know, because I’m genuinely curious!
You have to put a rubber band around your starter jar to monitor how far up it has risen in the jar…
I think this one is just silly. In my opinion, if you can’t tell that there is more starter in the jar than there was 5 hours before, then you weren’t paying enough attention when you fed your starter. Your starter should be bubbly and “ripe” when it is ready to be baked with. The word ripe really does describe what you are looking for here. You’ll look at it and just know it’t dying to be turned into bread. I go with my gut on this one. Lots of bubbles in my starter means it’t ready to rock.
You have to name your starter or it will think you don’t love it.
Ok, obviously I made this one up. But you should name your starter. That way when you pass it down to your kids and they pass it down to their kids it will have a name and feel more like an inheritance than a burden. Naming your starter gives it a legacy.
You can make a loaf of bread from unfed discard…
I have never tried this, one day I might just to see what happens. But this is definitely one of those trends that has broken the internet. So give it a try and see what happens. Then leave a comment below and let me know how it worked.
Popular terms that Sourdough people use…
Oven Spring: Once your loaf has proofed fully and you put it in the oven it should expand up to 30% of it’s original size in the first 10 minutes. This is called oven spring. I’ve never checked my bread ten minutes into baking, but based on how much it rises I would assume it has a good “oven spring.” But if you’re really curious you could set a 10 minute timer and check it to see how springy it is. But be sure to replace the lid because otherwise you will end up with a really crispy loaf.
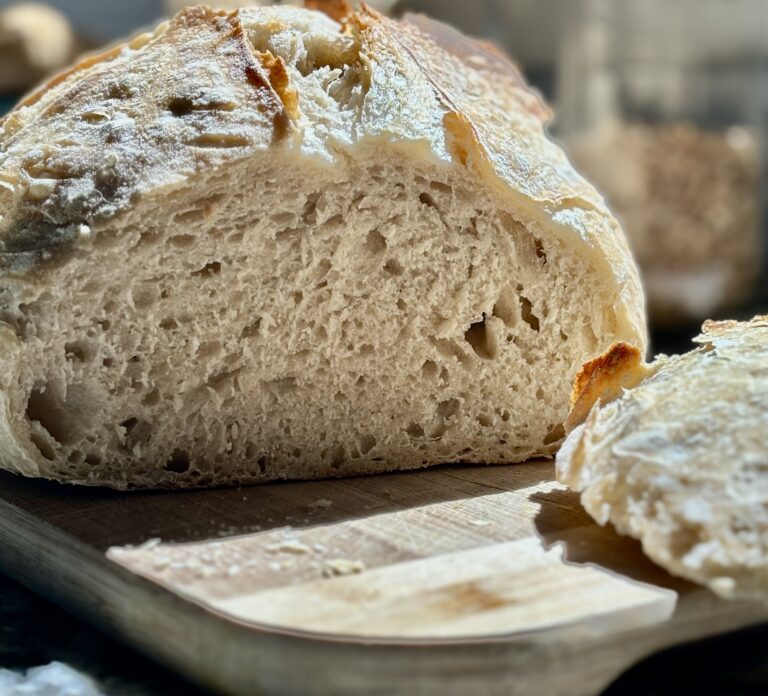
Crumb: First of all, what does crumb even mean? The crumb refers to the size and pattern of the holes inside a loaf of bread. Personally I like a tighter crumb, meaning that my bread has smaller more consistent holes. I prefer this because butter and jams fall through holes, and I’m only eating bread to be able to eat butter and jams, so I don’t want my toppings falling on the floor. But traditionally sourdough has an “open crumb” meaning there are larger holes in the loaf. The holes are still consistent, but they are larger, and easier for butter to fall through.
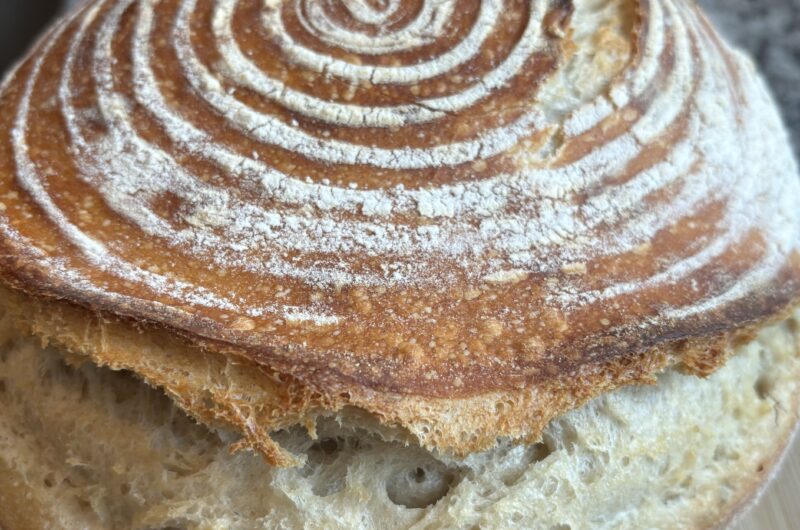
I wouldn’t worry too much about the crumb of your first few loaves. If you get the hang of sourdough and you really want to master the perfect crumb, there are thousands of Youtube videos out there that will help you do just that. But my priority is bread that has risen well, tastes good, isn’t gummy and if it looks pretty that’s an added bonus. I’ve never once thought, “this loaf could have a better crumb,” I just slather it in butter and enjoy it.
Again, all of these terms are making sourdough intimidating and unapproachable. My goal is to help you bake your first loaf with confidence and appreciation of the beauty of baking bread.
Hydration percentages: I’ll be honest, this is something I still struggle with. I didn’t really understand hydration for the first few years that I was baking bread. But recently I’ve been playing around with different levels of hydration to see what happens. This recipe has 65% hydration. This makes it a little easier to handle when shaping it, and slows down the fermentation process.
A higher hydration dough will give you a thinner crust and a more open crumb. A lower hydration will give you a more dense crust (not in a bad way though) and a more closed or tight crumb.
What type of flour should you use?
I use organic white all purpose every time I make bread. Once I was low on white flour so I used a mix of whole wheat and white and the loaf turned out fine. But I like an all purpose loaf more. Whole wheat flour contains more natural yeast and bacteria than all purpose, which can activate your starter faster. Adding a bit of whole wheat flour to your loaf changes the flavor, but I haven’t notice much difference other than that.
I’m sure there lot’s of science behind the type of flour you choose to use, but for your first few loaves I would stick to all purpose flour for feeding your starter and baking your loaf.
Let’s talk timing…
My starter usually takes 6 hours to rise. I live in the mountains in Colorado and sometimes my house is really cold and my starter simply won’t rise. When that happens I just feed it again the next morning and that always works.
Here is my go to schedule for baking bread…
7:00am feed starter
3-4:00 pm assemble dough (it depends on what time I get home. But I try to never start a loaf any later than 4:30 pm.)
4:30pm first stir
5:00pm second stir
5:30pm third stir
6:00pm fourth stir, cover and let sit for 3 hours.
9:00pm shape dough and place in banneton basket in the fridge.
Next Day
7:00am bake bread
This schedule can of course be flipped to work around your schedule. If you wake up really early in the morning you could feed your starter at 5am. You could also feed your starter at night, right before you go to bed and assemble your dough first thing when you wake up. Work the schedule around your day. It is time consuming, but it doesn’t have to encompass your entire day.
What do I need to bake sourdough?
A clear wide mouth jar to feed your starter in. You want the jar to be clear so you can see what your starter is doing. I like a wide mouth jar because it allows for easier stirring and cleaning. You also want the jar to have a loose fitting lid, or you can cover your starter with a wax paper wrap while it ripens.
A smaller jar that locks for discard. This is the jar you are going to put all of your discard in when you are not baking. I know some people that have jars upon jars of discard, and I don’t do that. I don’t make a lot of discard recipes (with a few exceptions). Instead I simply feed my starter from my discard jar, then whatever is left in my big jar after I bake bread goes right back into the discard jar.
A banneton basket. This is one thing I would recommend getting right off the bat. I find having a designated place to allow your dough to ferment overnight takes away from the stress of making sure the vessel you want to use is clean and accessible. The basket has one use and one use only, fermenting sourdough. Plus I dust it with rice flour every time I use it, and my dough never sticks to the basket. It’s nice and worn in by now.
If you don’t have a banneton basket you can use a glass or ceramic bowl that is the same size as your cooking vessel. You want the bread to be able to hold it’s shape while it ferments overnight.
A blade to cut an ear in your loaf. I like using a curved blade specifically for sourdough to cut my ear. I bought a package off Amazon that included two banneton baskets, basket liners, and a curved blade for about $18. It was well worth the investment. But if you are making bread and don’t have a blade yet use scissors to “snip” the top of your loaf 5-8 times to allow for steam to release. The small cuts will act like an ear.
A food scale. This may be the most important thing you buy for baking sourdough. Sourdough recipes are almost always by weight (grams to be more precise) and having a scale makes it a whole lot easier than trying to figure out how many cups of flour equals the needed weight in grams. Get yourself a food scale, you won’t regret it.
After using it for a few years now I purposely choose recipes that have weight measurements instead of cups. It’s more precise and means I don’t have to measure out 5 cups of flour every time I want to make pizza dough.
Get excited!
You just spent a significant amount of time reading about baking sourdough. And hopefully you feel encouraged and ready to concur the task at hand. If your first loaf comes out flat, make another one. If the second loaf comes out with an uneven gummy crumb, make another loaf. DON’T QUIT! You can do this. And reach out if you have questions. Either to me, or to one of the 100 people you know who make sourdough. But remember, everyone has an opinion. And what works for one baker may not work for another.