I used to buy cake mix, because it’s easy, but the cakes were never really that good.
Plus the cake mixes only come in a handful of flavors; vanilla, chocolate, red velvet etc. And every year since my kids could talk I’ve let them decide what kind of cake they want for their birthday. I should mention both of my kids have December birthdays 17 days apart, so there’s a lot of baking in a short period of time that month.
It started off with simple things like vanilla with chocolate frosting, or confetti (of course) but as they get older, their cakes requests get more extravagant. One year, my then 4 year old, asked for a four layer vanilla cake, but between each cake layer was a layer of fruit jelly; mango, strawberry and blueberry. This was the year I realized that I either needed to step up my cake making abilities, or find a friend who I could buy them from discretely. That cake turned out fine, and maybe one day I’ll make it again and post the recipe here, but for now it lives in our memories as a family favorite.
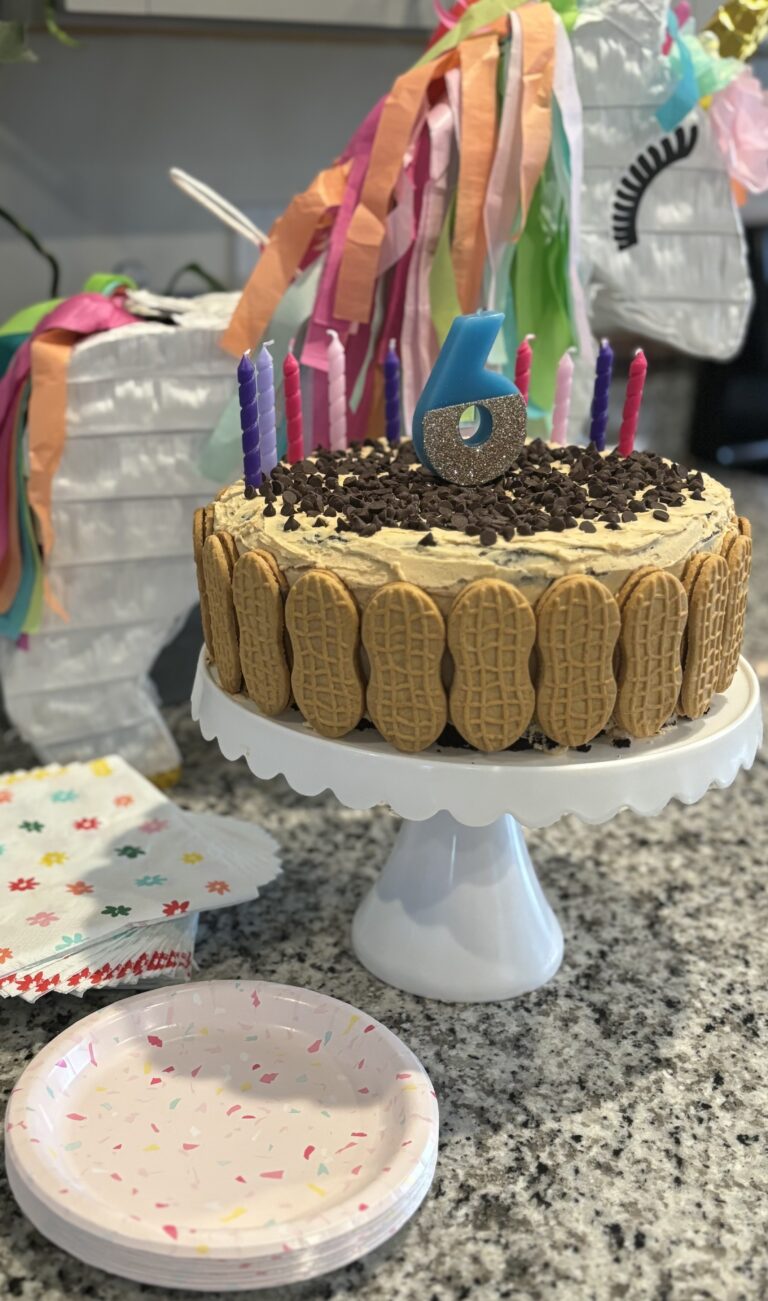
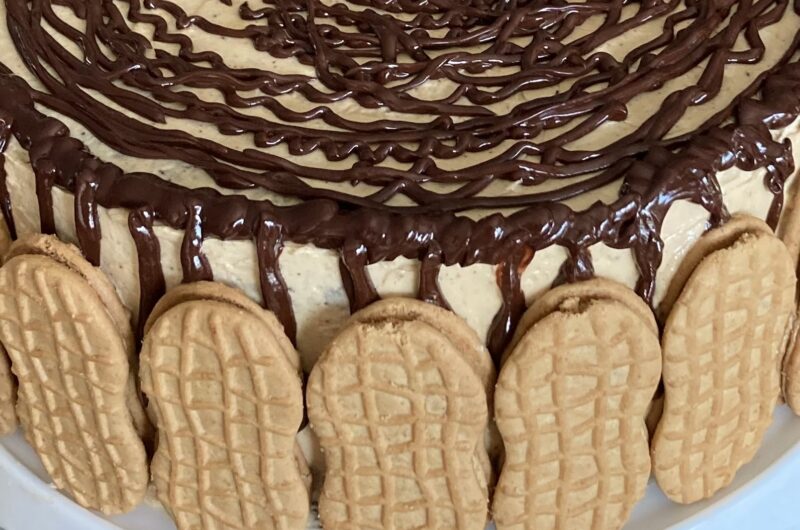
The last two years a chocolate peanut butter cake has been requested. And yes, it is as delicious as it sounds. Oddly my children both wanted the cake to be surrounded by Nutter Butter cookies, however the cake is just as good without them, but they do add a certain something to the look of the cake.
Baking cakes is intimidating, I should know, I almost failed my pastry class in culinary school. In fact that was the only class I didn’t get an A in. However, now that I’m more mature and well, a real adult, I’ve accepted that my cakes won’t ever be perfect, but with the right tools, making a pretty-enough cake that tastes AMAZING is totally do able, for anyone.
And really, as long as it tastes good who cares what it looks like?
There are plenty of great videos and blogs out there with amazing tutorials about how to frost to perfection, and use fondant to make characters and shapes. This is not that type of blog. This is the cake blog for moms who want to make their kids delicious and hopefully decent looking cakes. I promise your kids are never going to look back and say “man wish my mom had learned to make the perfect looking cake,” no they’re going to look back and say, “I’m so grateful that my mom took the time to bake me cakes from scratch, it made me feel really special every year on my birthday.”
Some thoughts on ingredients…
Cake flour VS. All purpose flour: Different types of flours have different protein content. The higher the protein content the “stronger” the flour. All purpose flour has a higher protein percentage which leads o the development of gluten. In contract cake flour has a lower protein percentage which discourages the development of gluten and leads to a finer texture and crumb.
All this to say…. If you are a perfectionist and haven’t gone to the grocery store for cake ingredients yet, you could use cake flour. But I have made some really delicious cakes with all purpose, and you know what? Not a single person has ever said “you didn’t use cake flour in this recipe did you?” So use what you got in the pantry.
Tip: Mixing leads to gluten development, so when making your cake be careful not to over mix, especially if you use AP flour.
Salted butter VS. Unsalted butter: Most recipes call for a little bit of salt, and the thought with desserts is that you don’t want it to taste salty. So using salted butter AND the necessary amount of salt could lead to a salty cake. I’m here to tell you that I cook exclusively with salted butter, and I use the prescribed amount of salt in every recipe, and never once have I thought my deserts tasted salty. In fact, when I make my chocolate chip cookies I use a little more salt than the recipe calls for, and they taste just a little bit salty and I love it! But if you don’t want your cake to be salty, you can use the recipe amount of salt and salted butter and it will turn out just fine.
Tools I think may be helpful with substitutes: If you only bake one or two cakes a year, there’s really no sense in going out and buying all the decorating accoutrements like piping bags and frosting tips. The few things I do recommend having are…
A proper cake pan. I prefer spring form because it’s easier to get the cake out of the pan. But any round non stick cake pan will do.
Parchment paper. Putting parchment paper under your cake in the pan will also keep it from sticking and make it easier to remove, even when you use a spring form its helpful to have the parchment paper liner.
Icing spatula. This is the one tool I have found to be helpful, and worth the money. I like a metal one vs. a silicone or rubber one, because I find that the metal ones glides better. If you are just now reading this and you are halfway through your cake and don’t want to run out for an icing spatula, use the back side of a bread knife, the non serrated side. It takes a little more finessing but works just fine in the end.
Things you can do without:
A piping bag and frosting tip. Instead of using a piping bag put all of your frosting into a plastic zip-lock bag, then cut one of the corners off of the bag to mimic the frosting tip.
Make sure not to cut the hole too big, you can always cut it bigger if needed, but you can’t make it smaller, but you can just get a new baggie if you cut it too big, so don’t stress about it!
Revolving cake stand. If you’ve ever watched a cake baking show you’ve seen the bakers using one of these, and I agree that they can be super helpful. But a good one is kind of pricey and takes up space in your cabinets. And again if you are only going to use it once or twice a year it’s probably not worth it.
A couple options; if you are planning to serve the cake on a cake stand anyway you could decorate your cake straight on there, that’s what I do. This gives me the advantage of not having to move my cake when it’s finished, and allows me to only have to store one cake stand during the year and not a decorative stand and a revolving one. I bought a $5 cake stand from Target 3 years ago and we use it every year.
If you don’t have any cake stands, once you have removed the cake from the round cake pan, let it cool and then flip it upside down and use that for your decorating stand. I have also done this and it works just great. It’s the same size as your cake and it’s just a little bit elevated making decorating pretty easy.
Cake supports or rods. If you are making a multi level cake you are going to need some supports to keep the top layers from sinking down into the bottom layers. But you don’t need to buy cake supports. Instead you can use plastic straws cut to the proper length. Your top layers should be set on cardboard, and that cardboard will rest against the plastic straws instead of sinking down into the layer below it.
Instagram Video